
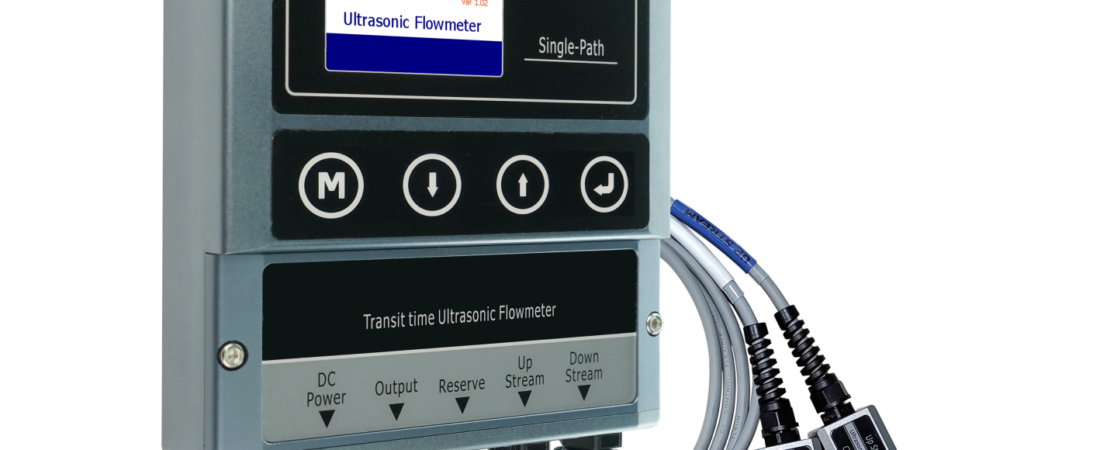
A clamp-on ultrasonic meter is rated ±0.5% to ±1.0% of reading, but that figure assumes a competent installation. In the field, the same instrument can deliver ±0.5% on one point and several percent error on another — and the difference is almost never the electronics. Clamp-on accuracy is dominated by installation and application factors. For the headline numbers, see our clamp-on accuracy guide; here we break down what moves the needle and how to control each factor. New to the technology? Start with our clamp-on flow meter overview.
The Nine Factors That Determine Accuracy
1. Pipe outer diameter and wall thickness data
The meter computes transducer spacing and velocity from the dimensions you enter. A few millimetres of error in OD or wall thickness translates almost directly into a flow error. Measure the pipe (ultrasonic thickness gauge for wall thickness) rather than trusting a nominal DN or an assumed schedule — especially on large, lined or aged lines. This is the single most common self-inflicted accuracy error. See also pipe size range.
2. Pipe material and lining
Every wall material has its own sound speed; selecting “steel” on a PVC or HDPE line biases the result. Lined pipes need the lining material and thickness entered as a second layer; a delaminated liner (air gap behind cement or rubber) can block the signal outright. Material effects are detailed in our pipe materials guide.
3. Surface preparation and coupling
Ultrasound must cross from transducer, through couplant, into the pipe wall. Loose paint, rust, scale, dirt or an air gap in the coupling grease scatters and weakens the signal, raising noise and drift. Clean and lightly abrade the mounting patches, apply a continuous bead of fresh acoustic couplant, and seat the transducers firmly. On hot lines use high-temperature couplant.
4. Transducer spacing and mounting method (V vs Z)
Mount the transducers at the exact spacing the meter displays for your pipe. Small pipes usually use V-method (reflected path); large, thick-walled, lined or hard-to-couple pipes use Z-method (direct diagonal path, opposite sides) for a stronger signal. Wrong spacing or method degrades the transit-time measurement directly. Step-by-step rules are in the installation guide.
5. Straight run and flow profile
Elbows, tees, valves, pumps and reducers create swirl and asymmetric flow. Aim for at least 10–15 pipe diameters of straight run upstream (and ~5D downstream) of the transducers; more after multiple elbows or a pump. A distorted profile averages incorrectly even with a perfect signal.
6. Signal quality (SQ)
The meter reports signal strength/quality live. A stable reading of roughly SQ ≥ 50–60 (varies by model) indicates a reliable path; a low or fluctuating SQ means the transit-time timing is noisy and the reading will drift or jump. If SQ is poor despite good couplant and prep, switch to Z-method, check the pipe is full, or move to a straighter section. Signal quality is your real-time accuracy indicator — do not ignore it.
7. Full pipe and fluid conditions
Transit-time needs a completely full pipe of clean, single-phase liquid. A partially filled line, entrained gas bubbles, or high solids content scatter the pulse; transit-time struggles once gas/solids exceed roughly 10% — that is Doppler or magnetic-meter territory (transit-time vs Doppler). Deposits, wax or scale on the inner wall also attenuate the signal.
8. Fluid temperature and sound speed
Sound velocity in the liquid varies with temperature and composition. Selecting the correct fluid type in the meter lets it use the right sound-speed/temperature relationship; very hot lines need high-temperature transducers and couplant. Wide temperature swings can shift readings slightly if the wrong fluid profile is selected.
9. Zero calibration and electronics stability
With the meter correctly installed at a no-flow (or known) condition, a zero-set / static calibration cancels any small electronic offset. Quality meters auto-drift-compensate, but performing the zero routine after mounting — and keeping the transducer cable away from heavy electrical noise — removes a baseline bias. Repeatability (±0.2% or better on good units) is usually excellent once the offset is zeroed.
Quick Checklist for Best Accuracy
| Factor | Do this |
|---|---|
| Pipe dimensions | Measure OD & wall thickness; don’t assume nominal size |
| Material / liner | Select correct material; enter lining type + thickness |
| Surface & couplant | Clean/abrade patches; fresh full couplant bead; firm seating |
| Mounting | Exact displayed spacing; V-method small / Z-method large-hard |
| Straight run | ≥10–15D upstream, ~5D downstream |
| Signal quality | Stable SQ ≥ 50–60 before trusting the reading |
| Fluid | Full pipe; clean single-phase liquid; correct fluid type |
| Zero | Run zero-set after mounting at no-flow if possible |
Getting the ±0.5% End of the Range
The headline ±0.5% is achievable but it rewards care: accurate pipe data, well-prepared surface, Z-method on difficult large/lined lines, generous straight run, and a strong stable signal. Premium high-power instruments with advanced signal processing — such as the YF-C8 — hold high accuracy on large, lined or challenging pipes where a basic unit would drift; the YF-C6 covers the majority of plant and water duties. Portable YF-P1/YF-P2 units reach the same accuracy band on the same pipe (portable vs fixed), which is why engineers use a portable to site-verify a fixed install before accepting it. The physics behind all of this is in how clamp-on meters work, and mounting limits/tables are in the manuals on the Downloads page.
Frequently Asked Questions
What most affects a clamp-on flow meter’s accuracy?
The biggest contributors are (1) accurate pipe OD and wall-thickness data, (2) correct pipe material/lining selection, (3) surface preparation and couplant quality, and (4) adequate straight run plus strong, stable signal quality. When these are right, ±0.5–1.0% accuracy is routine; when they are not, errors of several percent are possible — almost always an installation issue rather than the electronics.
What signal quality should I see for an accurate reading?
Look for a stable signal-quality indicator of roughly SQ ≥ 50–60 (model-dependent) that does not fluctuate. A low or jumping SQ means the transit-time timing is noisy: improve surface prep and couplant, switch from V- to Z-method mounting, confirm the pipe is full, or move to a straighter section. The live SQ reading is your on-the-spot accuracy check.
Can a portable clamp-on meter be as accurate as a fixed one?
Yes. On the same pipe, correctly installed, portable and fixed clamp-on meters share the same transit-time accuracy (±0.5–1.0%); accuracy depends on installation, not portability. Service teams routinely use a portable YF-P1/YF-P2 to verify a permanently installed meter, because both read to the same band with no shutdown required.
Want Help Maximising Accuracy on Your Line?
YS-Flux clamp-on meters are engineered for ±0.5–1.0% transit-time accuracy when correctly installed, and our engineers support mounting configuration and site verification. Send us your pipe material, OD, wall thickness, lining, liquid and temperature — we will confirm the model, transducer set and mounting method for the best achievable accuracy within one business day. Request a Quote →